Difference between revisions of "VNC"
| Line 5: | Line 5: | ||
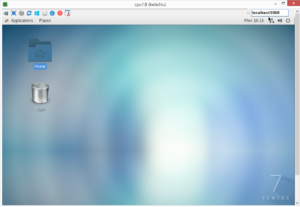
[[File:Capture.png|thumb|UltraVNC connection showing a user desktop]] | [[File:Capture.png|thumb|UltraVNC connection showing a user desktop]] | ||
| − | == Step 0: (First time only) == | + | == Step 0: Configure password (First time only) == |
Connect via SSH and ensure you have setup a VNC password: `vncpasswd`. This should create the hidden folder `~/.vnc` if it didn't already exist. Copy `/home/utils/vncstuff/xstartup` to `~/.vnc` to get a working configuration for a desktop environment(xfce). This step may already have been done for you by an admin, in which case your vnc password equals your user name. | Connect via SSH and ensure you have setup a VNC password: `vncpasswd`. This should create the hidden folder `~/.vnc` if it didn't already exist. Copy `/home/utils/vncstuff/xstartup` to `~/.vnc` to get a working configuration for a desktop environment(xfce). This step may already have been done for you by an admin, in which case your vnc password equals your user name. | ||
Revision as of 08:19, 1 June 2020
VNC gives users a remote desktop Graphical User Interface. Our VNC server requires a VNC viewer application of your choice.
Contents
Connection Mechanism
Our cpu1 server runs tigerVNC, this allows users to start server instances with a shell command vncserver. Users need a VNC viewer to connect to a VNC server instance.
Step 0: Configure password (First time only)
Connect via SSH and ensure you have setup a VNC password: vncpasswd. This should create the hidden folder ~/.vnc if it didn't already exist. Copy /home/utils/vncstuff/xstartup to ~/.vnc to get a working configuration for a desktop environment(xfce). This step may already have been done for you by an admin, in which case your vnc password equals your user name.
Step 1: Start a remote vncserver instance
A user must first start a running vnserver process and connect to it: vncserver will start an instance with default settings. You can see your running instances with vncserver -list.
A more specific example: vncserver -name <sessionname> :<N> where <N> is an integer. E.g. vncserver -name bobsvnc :23 will create a session at display number 23, which means they have to connect to port 5923. The port formula is 5900+N. Ports occupied by others are not available, so if 23 was taken in the previous example it would have tried 24, etc.
Step 2: Establish an SSH tunnel
SSH port forwarding is the canonical solution in case the firewalls prevent direct connection to the vncserver:port. See shell access for details. The current firewalls do not allow direct access on the VNC ports, so this step is necessary.
Step 3: Connect with your VNC viewer
- Open the viewer and connect to localhost:<port>, where <port> depends on your tunnel configuration. E.g. You setup a vncserver on 5908, then with a tunnel mapping port 5900 to remote:5908, your VNC viewer would connect to localhost:5900. You'll be prompted for your vnc password to continue.
vncserver -kill, and don't use uncompressed high quality video settings
